This year we are trying to be more organized and systematic with our tree planting and seedling production. We enjoy buying trees and seeds a lot and hope to do better at taking care of and keeping track of all the things we’ve bought and planted.
There’s an excellent guide to reforestation called “How to Plant a Forest: The Principles and Practice of Restoring Tropical Forests” by Forest Restoration Research Unit of Chiang Mai University. We hope to incorporate many of the practices mentioned in that guide at our project. The guidebook used to be available on their website as a free download. Their website doesn’t seem to be working anymore, so I’ve put a downloadable copy here!

According to the guidebook, these are essential features of a tree nursery:
- shaded area with benches for seed germination, protected from seed predators by wire mesh
- shaded area for potted seedlings, with removable shade for hardening
- work area for seed preparation
- reliable water supply
- lockable storage for materials and tools
- fence to keep out stray animals
- shelter and toilet for staff and visitors
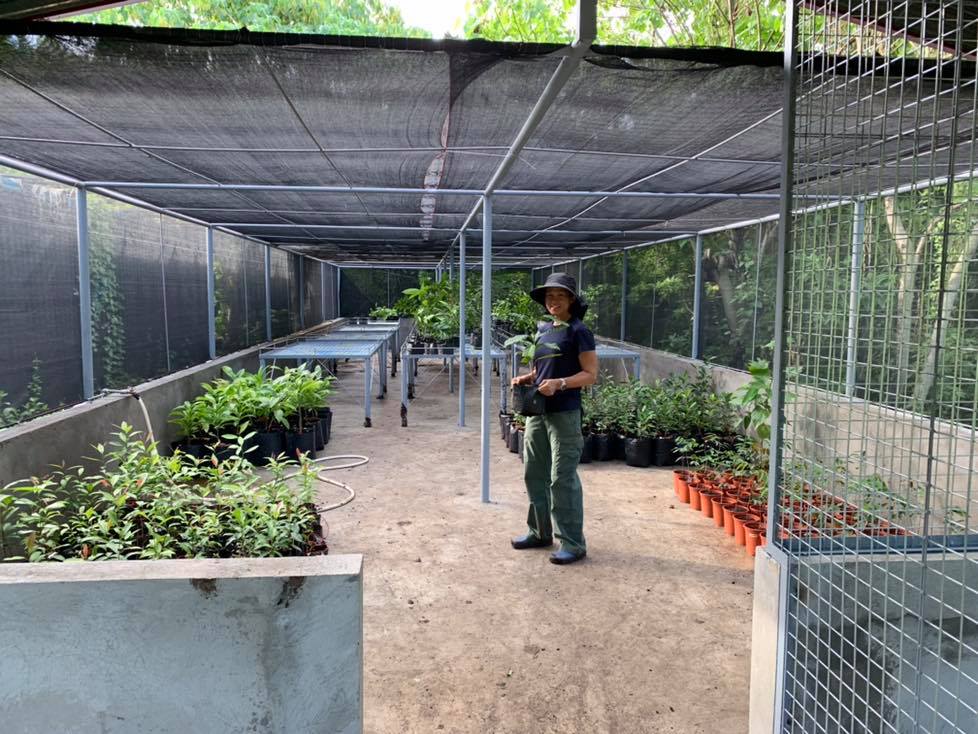
We converted an old unused piggery that the previous land owners built into a new nursery.
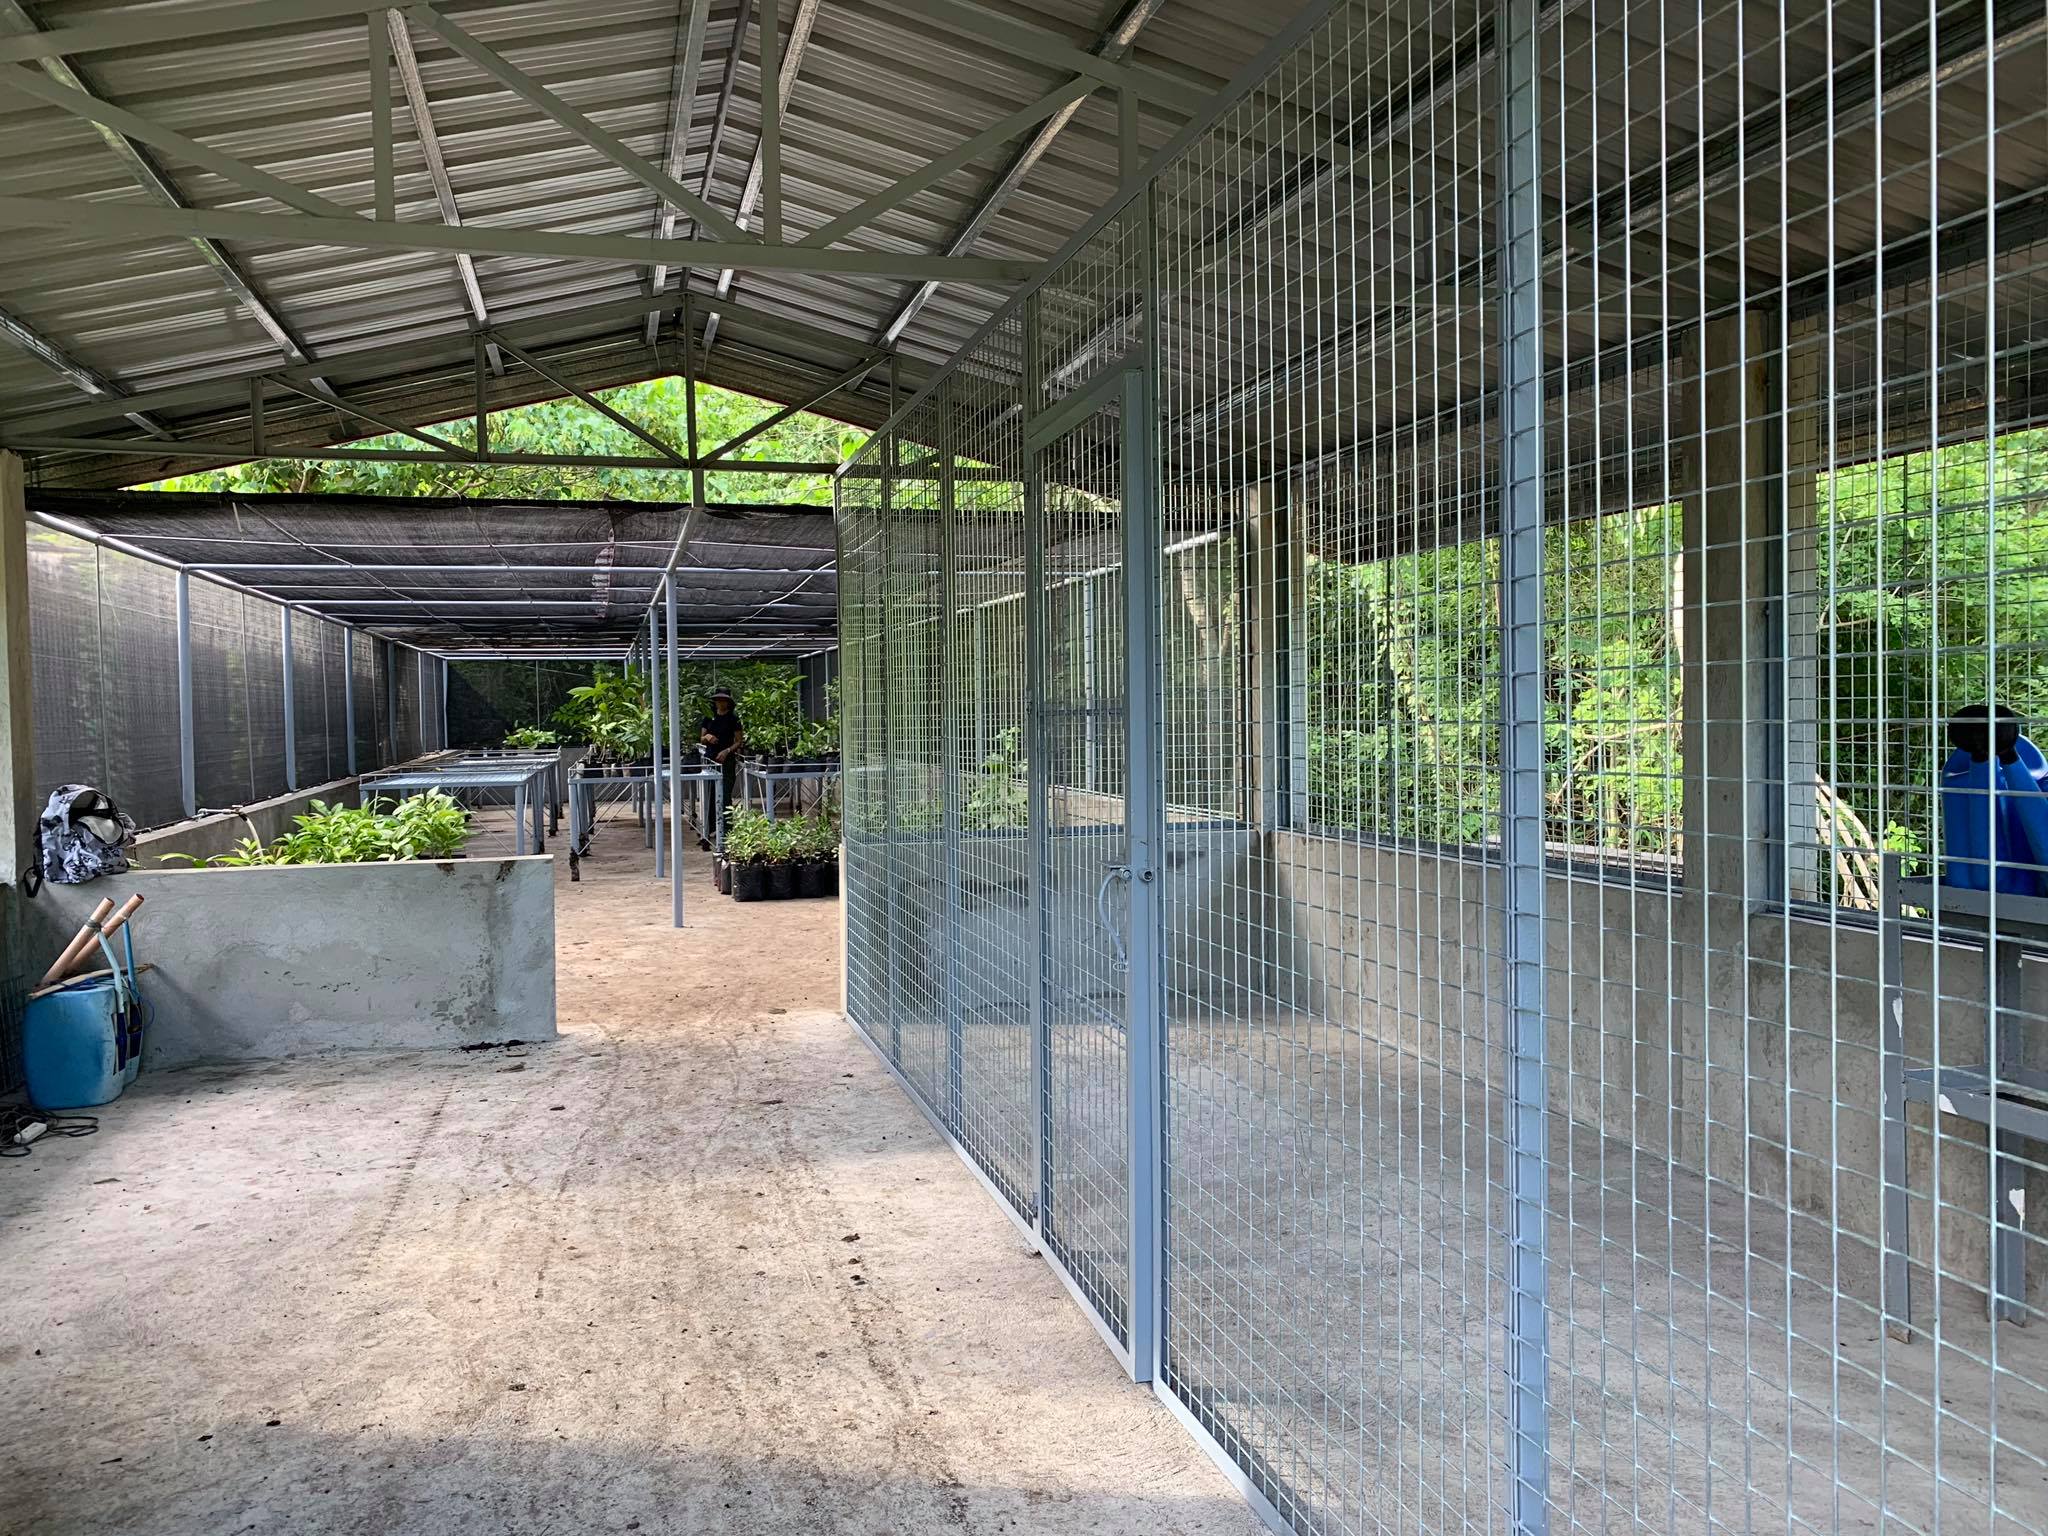

The tables are a great improvement! The seedlings are now easy to see and organize. In our old nursery, the seedling bags were on bare ground. The roots of some seedlings would go through the bag and into the ground! It is hard to extricate the seedlings from the ground once this happens.
There are a lot of nursery practices described in the book that we want to incorporate into our nursery. Things like keeping better records, how to harden off the seedlings before planting them, and using root trainers.
According to the guide, these are the basic steps in tree planting:
- Stake out the area where you will plant the seedlings. Mark the spots with a 50 cm stake. Space the seedlings randomly or 1.8 meters apart.
- Distribute the seedlings among the people planting. Use baskets to carry the seedlings.
- Dig the planting hole using a hoe. The hole should be 2x the volume of the container. Clear the weeds in a 50 to 100 cm diameter circle around the planting hole.
- Remove the seedling from the bag making sure to keep the root ball intact. Slash the bag if necessary.
- Plant the seedling. Make sure the root collar is level witht he soil surface. Fill in with loose soil. Press down with the palm of the hand to make it firm.
- Add fertilizer.
- Cover with mulch.
- Water the seedling.
- Replace the stake.
- Clean up the site and remove the plastic bags.
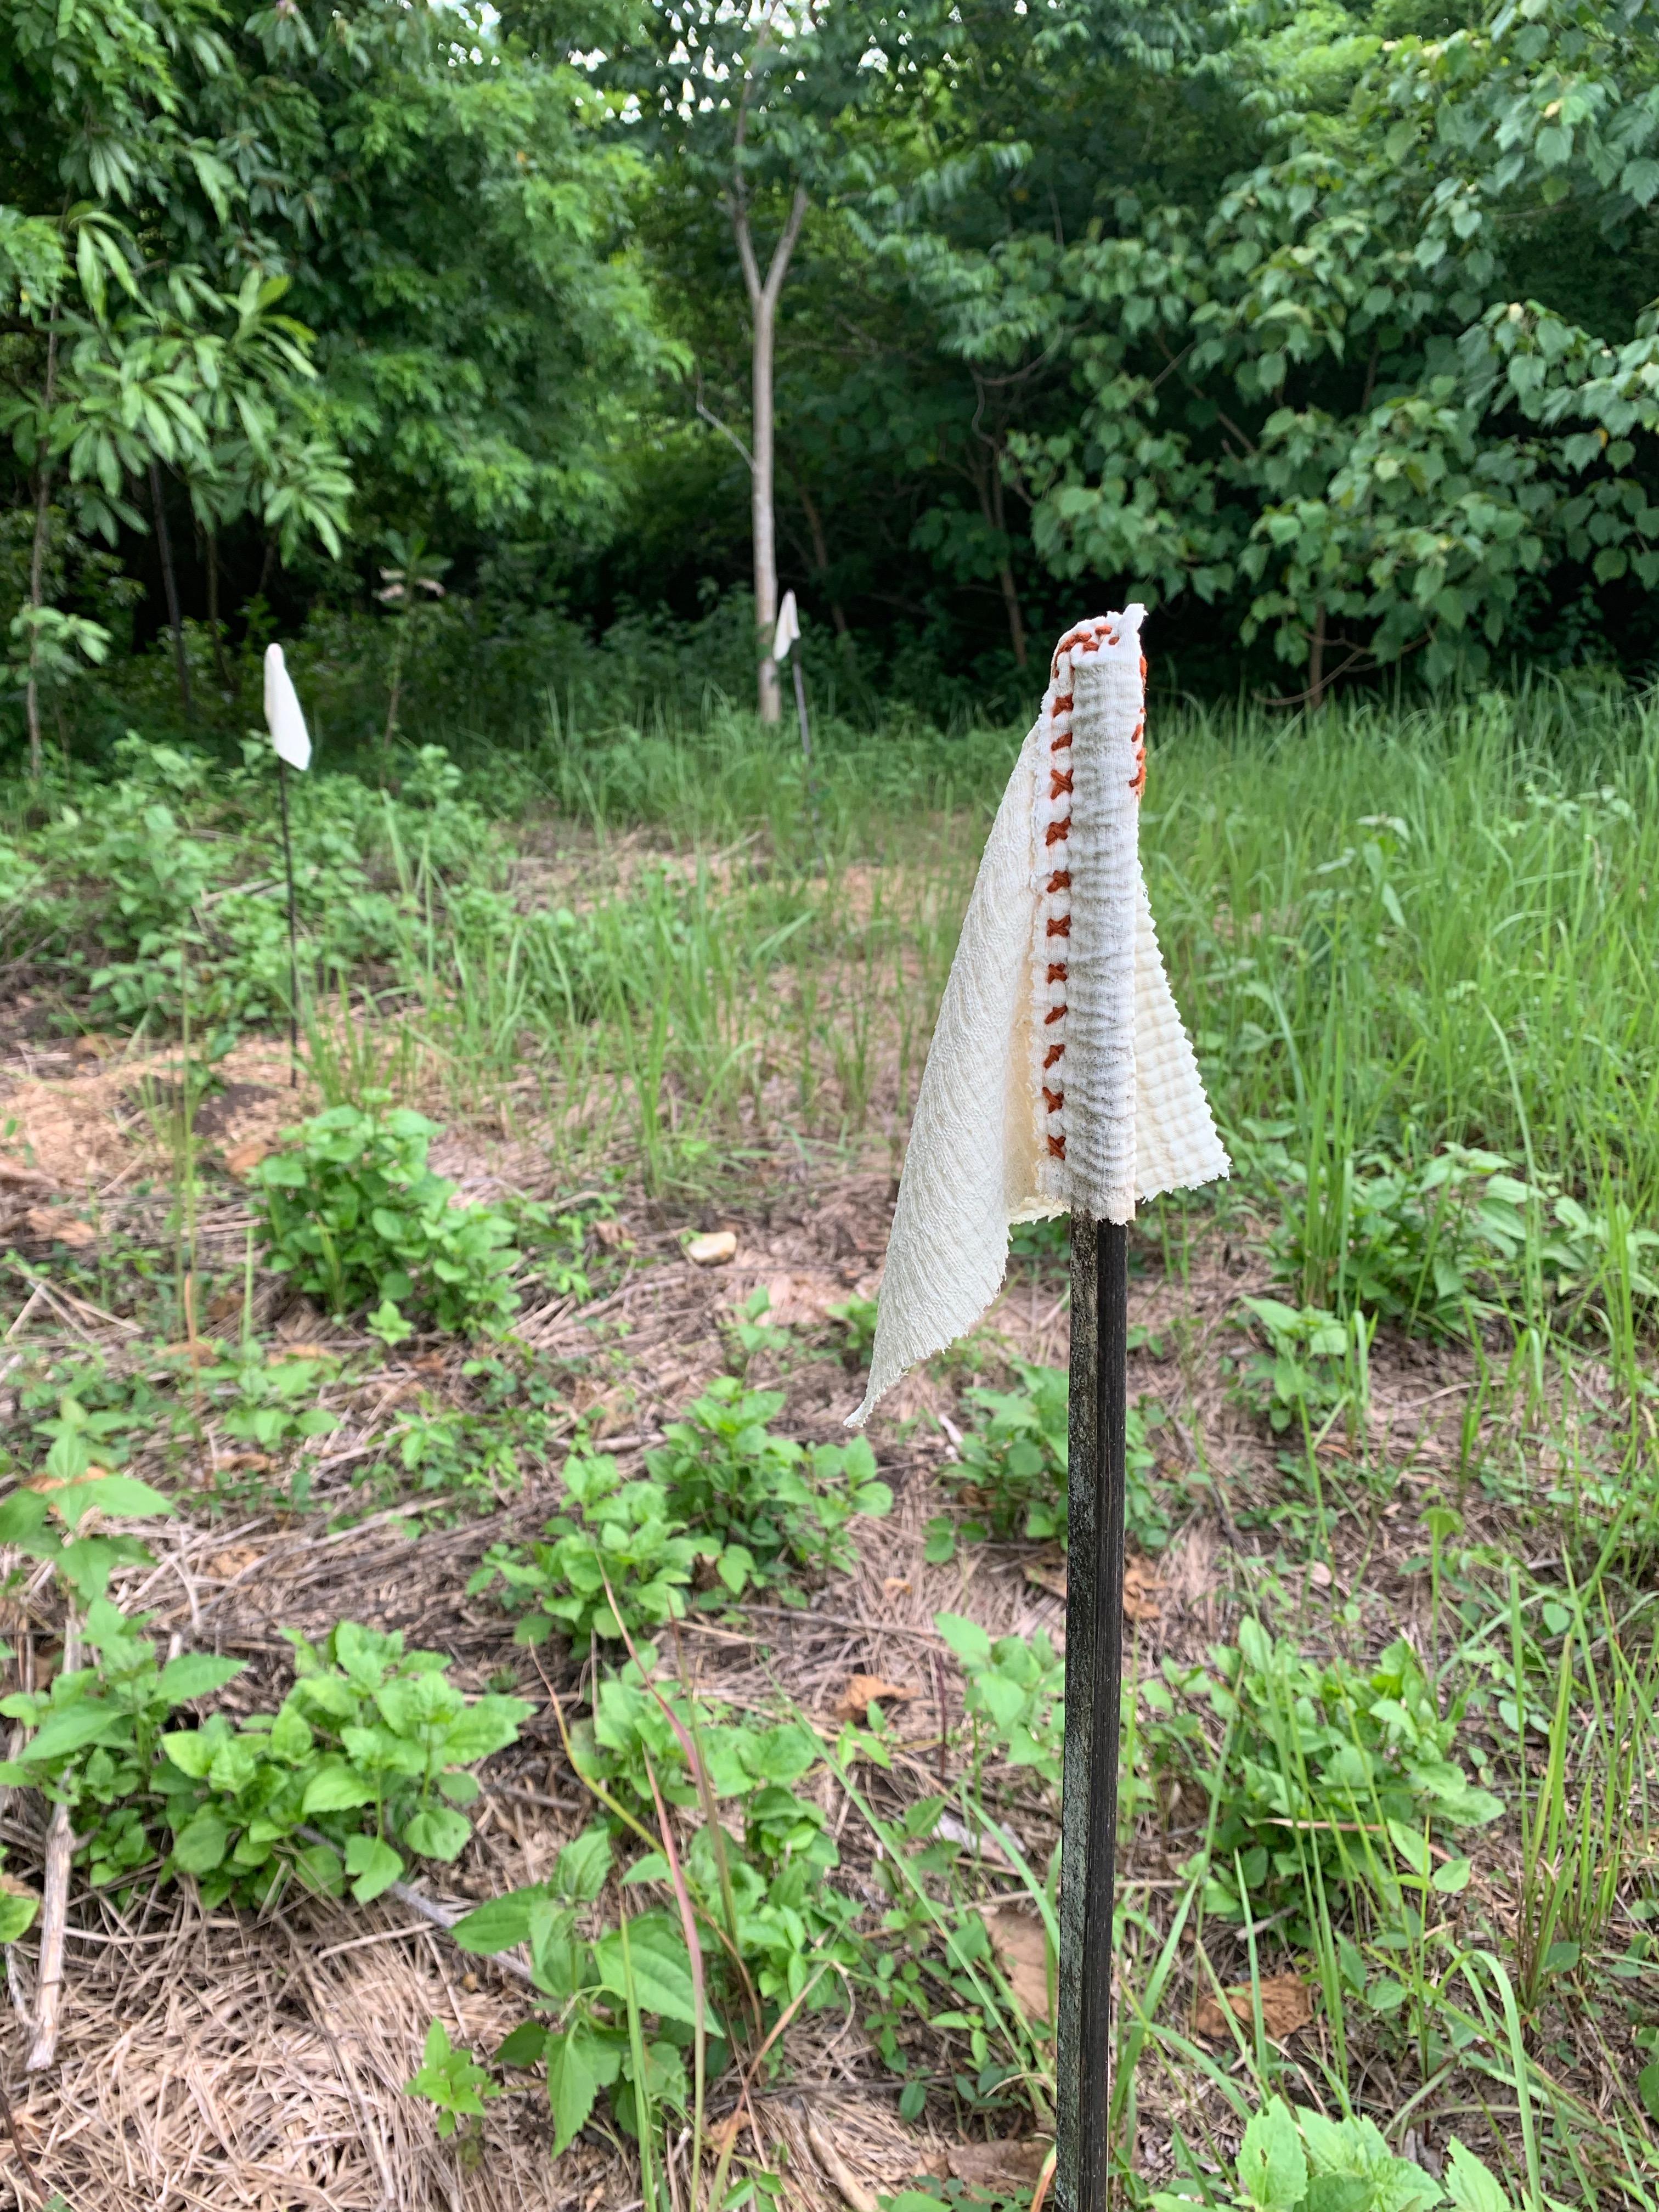
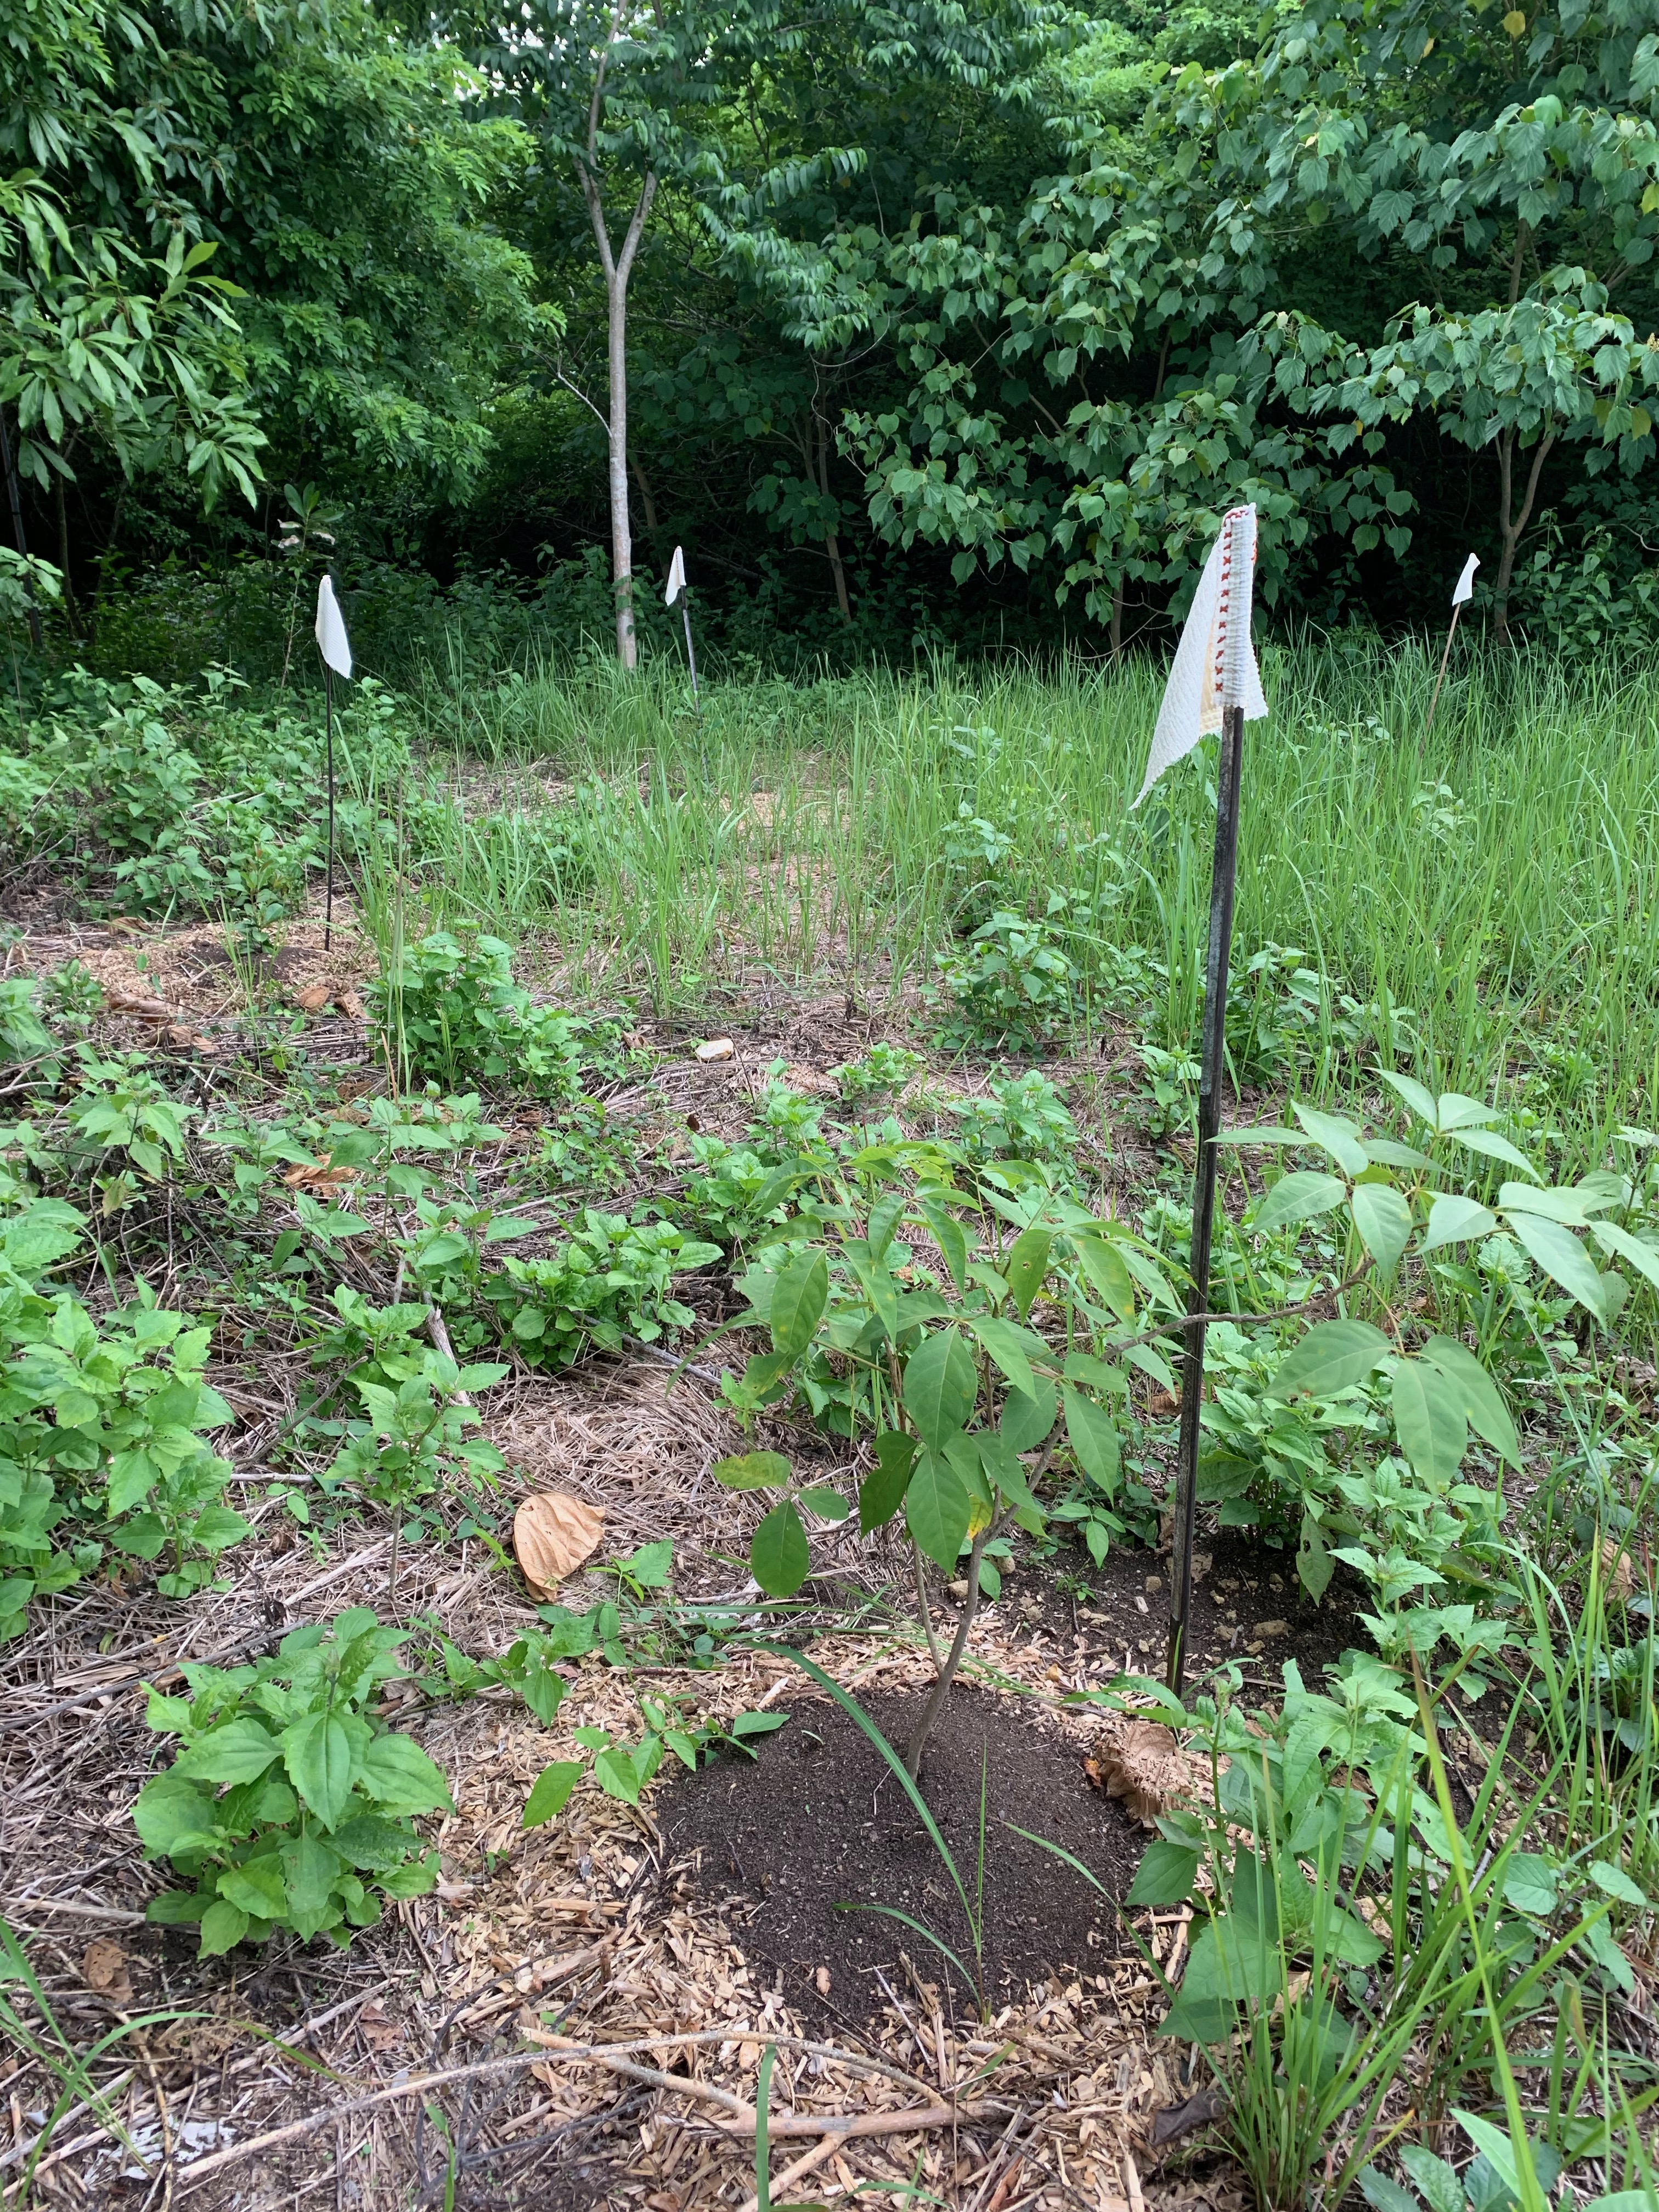
The bamboo stakes and flags make it much easier to see where the seedlings are planted. This will help a lot in keeping track of the newly planted seedlings. Another option to making flags is to paint stripes on the stakes.
These simple improvements have made something that was already fun even better!

Hi Sylvia! I love those raised tables and quilted flags. Your nursery looks so neat and organized with lots of room for more plants.
Did you make the flags? Good job on repurposing old quilts!
Where did you buy those metal tables? I have seen them in some nurseries here in VA and wish I could fit one in my garage.
On another post, I liked the metal labels you used for the trees. Where did you have them made? I also want to make sturdy labels for a few trees in my small garden.
Hi Arlene! Thank you! Most of the tables are full already, plus there’s spill out on the floor. We have a lot of seeds in seedling bags. Our neighbor’s driver gave us a lot of seeds. We had those tables made based on the pictures of tables for sale there in the US! Check out the online sites, there are many options. Our metal labels are aluminum Dymo. The tape doesn’t work with the regular Dymo machine, you need the one that’s just for metal tape. I also happened to find a lot of metal Dymo tape on sale here, so it came out quite cheap. I’ve seen aluminum tags that you can write on with a pencil. Check out “alitags” online, the pencil writing becomes permanent! They also have other materials like copper.
Thank you for the info. I will check your sources. Are your seedling bags also locally made?
Those are the local seedling bags that are most commonly used in nurseries here. They are single use! We stopped buying those, so wasteful. We’re now trying reusable plastic pots. We were thinking of using clay pots or coir pots, but haven’t tried them yet.
I forgot to add .. yes I made those flags. I wanted to make flags that were biodegradable and didn’t require buying any materials.